Get started with Geeky Hugo
Congrats on finding the perfect theme for your blog. You have great taste that’s for sure, this guide will help you get your blog up and running with the Geeky theme in no time.
Let’s Get Geeking
First, if you haven’t already, you’ll need to download the Go programming language. Hugo is built on Go, so it’s essential to have it installed before you can use Hugo.
Next, proceed to install hugo
- Mac
brew install hugo
or
sudo port install hugo
- Windows
choco install hugo-extended
- Linux
sudo apt install hugo
If you encounter any issues, please refer to the hugo installation docs for better details.
Next you’ll need a text editor, personally I use VScode but any text editor will do, neovim, nano, notepad etc. Although you should have a terminal ready to go.
Clone the geeky repository. Open your terminal and enter the following command:
$ git clone git@github.com:statichunt/geeky-hugo.git
After cloning, navigate into the newly cloned repository with:
$ cd geeky-hugo
If you don’t already have vscode , I recommend downloading it. It will simplify the management of this directory. However, if you’re already using another text editor, the instructions provided will be applicable to any editor you choose.
Open the folder in vscode or your preferred text editor:
$ code .
You’ll see a bunch of folders here. Don’t worry, we’re only going to adjust a few of them.
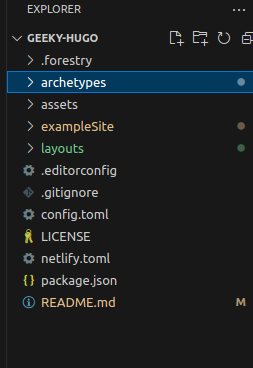
Look for a folder named exampleSite.This is where you’ll customize your blog to your liking. But before we get into that, let’s take a look at the config.toml file in the root directory.
In this file, you can make some changes to customize the look of your blog. For example, you can change the main color of your blog’s theme by replacing the current color in color_primary with your desired color. You can also update other options, like the font size, to match your style.
    ######################### site variables ##############################
    # customize your color and font from here.
    [params.variables]
    color_primary = "#2ba283"
    body_color = "#FFF"
    text_color = "#555"
    text_dark = "#222"
    text_light = "#999"
    border_color = "#E1E1E1"
    black = "#000"
    white = "#FFF"
    light = "#f2f2f2"

    # font variables
    # base font size for full website,
    font_size = "15px" # default is 16px
Now navigate to the exampleSite folder:
$ cd exampleSite
If everything is set up correctly, this command should work:
$ hugo server --themesDir ../..
Awesome we can now access the site at: http://localhost:1313/geeky-hugo/
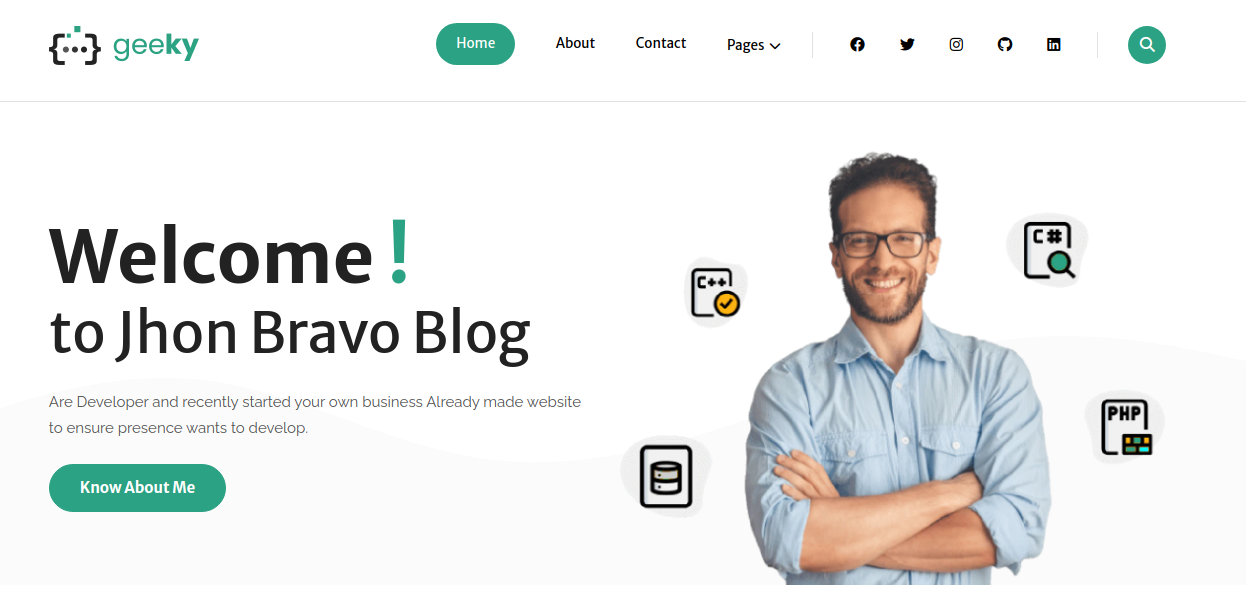
The site isn’t quite ready for production yet. There’s still a few things that need to be configured.
The assets, config, and content folders are the ones we’ll be working with the most. Here’s a brief overview of each:

Assets
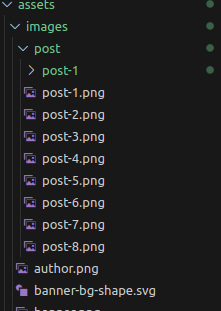
This folder will hold all the static files for your blog. The only thing that should matter to you here is the images, this is where you store all your images. The images you see above including the blog banner:
Config
As the name suggests, we’ll be doing a bit of setup to get your blog ready for production. Just kidding, it’s actually quite simple!
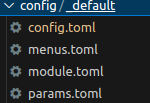
Let’s kick things off with the config.toml file:
########################### default configuration ####################
baseURL = "https://demo.statichunt.com/geeky-hugo/"
title = "Geeky | Hugo Personal Blog Template"
theme = "geeky-hugo"
languageName = "En"
languageCode = "en-us"
# post pagination
paginate = "6"
# post excerpt
summaryLength = "20"
# google analytics
googleAnalytics = "" # example: UA-123-45, for more info, read the article https://support.google.com/analytics/answer/1008080?hl=en
# disqus short name
disqusShortname = "themefisher-template" # get your shortname form here : https://disqus.com
# disable language
disableLanguages = ["fr"] # example: ["fr"] for disable french language
Configuration Overview:
- Set the
baseURLto match the domain name you want your site to use:
baseURL = "https://blog.example.com"
Ensure it starts with “https://” or “http://”.
- Define the
title, which serves as the meta title tag. Choose a title that reflects your blog’s content:
title = "Geeky | Hugo Personal Blog Template"
- Ensure the theme remains as specified:
theme = "geeky-hugo"
- Adjust post pagination by setting the
paginatevalue:
# Post pagination
paginate = 6
-
Integrate Google Analytics and Disqus for site analytics and comments:
- Google Analytics:
- Obtain your Google Analytics tracking ID.
- Update the
googleAnalyticssetting:
- Google Analytics:
googleAnalytics = "UA-12345678-9" # Replace with your actual tracking ID
- Disqus:
- Sign up for a Disqus account and obtain your Disqus shortname.
- Update the
disqusShortnamesetting:
# Disqus short name
disqusShortname = "your-disqus-shortname" # Replace with your actual Disqus shortname
- Specify the primary language of your site, its code, and choose to disable any additional languages as needed:
languageName = "English"
languageCode = "en-US"
disableLanguages = ["fr"]
Next Steps:
- menus.toml: Contains all the menus for your blog. You typically do not need to make any changes here unless you wish to remove or add a menu.
- module.toml: Contains a list of all the dependencies for the blog. There’s generally no need to modify this file.
params.toml
This file is where we’ll be doing a significant amount of configuration.
To adjust the file as per your requirements, follow these guidelines:
- Favicon and Logo: Specify the paths to your favicon and logo images. For the logo, you can also set its width. If the logo is missing, the logo text will be displayed.
favicon = "images/favicon.png"
logo = "images/logo.png"
logo_width = "150x"
logo_text = "Geeky"
- Navbar: Decide whether the navbar should be fixed to the top of the page.
navbar_fixed = false
- OpenGraph / Twitter Card Metadata: Set the description, author, and image for SEO purposes.
description = "This is meta description"
author = "Themefisher"
image = "images/logo.png"
- Contact Info: Provide your contact details.
address = "9567 Turner Trace Apt. BC C3G8A4"
mobile = "+211234565523"
email = "info@email.com"
- Search: Enable or disable the search feature.
search = true
- Posts Related Titles & Contents: Customize the titles and buttons for posts related sections.
categories_title = "Blog Categories"
posts_title = "Featured"
featured_post_title = "Featured Post"
recent_post_title = "Recent Post"
featured_post_button = "Featured"
recent_post_button = "Recent"
read_more_button = "Read more"
previous_button = "Previous"
next_button = "Next"
related_posts = "Related Posts"
showing_posts = "Showing Post From"
no_categories_found = "No Categories Found"
no_tags_found = "No Tags Found"
- Main Sections: Specify the main sections of your blog.
mainSections = ["blog"]
- About Widget Content: Customize the content for the about widget.
about_widget_content = "Lorem ipsum dolor sit amet, consectetur adipiscing elit. Vel in in donec iaculis tempasus odio nunc laoreet . Libero ullam rgscorper."
- Footer Content: Customize the footer content.
footer_content = "Lorem ipsum dolor sit amet, consectetur adipiscing. donec iaculis tempasus laoreet. Libero ullam rgscorper."
- Custom Script: Add any custom scripts you need.
custom_script= ""
- Copyright: Enable or disable the theme copyright and customize the copyright text.
theme_copyright = true
copyright = "Copyright by your company"
- 404 Page: Customize the text for the 404 error page.
error_404_text = "404 Page Not Found!"
error_404_button = "Back To Home"
- Preloader: Enable or disable the preloader and specify its image.
[preloader]
enable = false
preloader = ""
- Banner: Customize the banner settings.
[banner]
enable = true
title_large = "Welcome **!**"
title_small = "to Jhon Bravo Blog"
image = "images/banner.png"
background_image = "/images/banner-bg-shape.svg"
content = "Are Developer and recently started your own business Already made website to ensure presence wants to develop."
button_label = "Know About Me"
button_link = "about/"
- Advertisement: Specify the advertisement image and link.
[advertisement]
image = "images/promotion.png"
link = "https://gethugothemes.com/"
- Cookies: Enable or disable cookies and customize the content and button text.
[cookies]
enable = false
expire_days = 2
content = "This site uses cookies. By continuing to use this website, you agree to their use."
button = "I Accept"
- Sidebar Widgets: Specify the widgets to be displayed in the sidebar.
[widgets]
sidebar = ["about", "categories", "recent-post", "newsletter"]
- Subscription: Enable or disable the subscription feature and customize its settings.
[subscription]
enable = false
newsletter_title = "Newsletter"
newsletter_invitation = "Join thousands of Tiny Salt subscribers and get our best recipes delivered each week!"
newsletter_placeholder = "Type And Hit Enter"
newsletter_reminder_a = "By Singing Up, You Agree To"
newsletter_reminder_b = "Privacy Policy"
newsletter_button = "Sign in"
mailchimp_form_action = "https://gmail.us4.list-manage.com/subscribe/post?u=463ee871f45d2d93748e77cad&id=a0a2c6d074"
mailchimp_form_name = "b_463ee871f45d2d93748e77cad_a0a2c6d074"
- Social Sites: Add or remove social media links.
[[social]]
title = "facebook"
icon = "fab fa-facebook"
link = "#"

[[social]]
title = "twitter"
icon = "fab fa-twitter"
link = "#"

[[social]]
title = "instagram"
icon = "fab fa-instagram"
link = "#"

[[social]]
title = "github"
icon = "fab fa-github"
link = "#"

[[social]]
title = "linkedin"
icon = "fab fa-linkedin"
link = "#"
Adjust these settings according to your blog’s requirements and preferences.
Content
Inside the content folder, you’ll find the blog folder, which is where all your articles are stored in Markdown files (e.g., post-2.md, post-3.md, etc.). Before creating new articles, delete the previous posts or update them as they are just demos. Simply create a new .md file. Markdown (.md) is a lightweight markup language for plain-text formatting. Articles within these .md files are composed in Hugo’s Markdown format.
To learn more about Hugo Markdown check out the official Hugo documentation at https://gohugo.io/documentation/
.
The first thing you add into the .md file is the front matter. The front matter block is typically placed at the beginning of a Markdown file (.md) or other content files in Hugo. It provides important metadata that Hugo uses to generate the static site. When Hugo builds the site, it reads this metadata and uses it to generate the appropriate HTML templates and content.
Begin your article with the following front matter and modify it as necessary:
---
title: "your post title"
description: "meta description"
image: "images/post/post-1.png"
date: 2021-01-24T18:19:25+06:00
categories: ["category"]
tags: ["tag1", "tag2"]
type: "regular" # available types: [featured/regular]
draft: false
---
After the front matter, you can begin writing your article.
For content files that aren’t located within the blog directory, such as about.md, contact.md, privacy-policy.md, and search.md These files populate the on your site. Adjust them as needed:
Example:
- About Page (
about.md)
This file is used to create an “About” section on your site. It includes details about you
---
title: "About The Author"
description: "this is meta-description"
image: "images/author.png"
layout: "about"
draft: false

# education
education:
 enable: true
 title: "Formal Education"
 ...

# experience
experience:
 enable: true
 ...
Once you’re done setting everything up, your blog should be ready to go live.
There’s a lot more that we couldn’t cover here, but you can find more information in the Hugo documentation . So go check it out, and happy geeking!
Related Posts
Drone Software and Development
Nam ut rutrum ex, venenatis sollicitudin urna. Aliquam erat volutpat. Integer eu ipsum sem. Ut bibendum lacus vestibulum maximus suscipit. Quisque vitae nibh iaculis neque blandit euismod.
Read moreGithub Repository Controls
Nam ut rutrum ex, venenatis sollicitudin urna. Aliquam erat volutpat. Integer eu ipsum sem. Ut bibendum lacus vestibulum maximus suscipit. Quisque vitae nibh iaculis neque blandit euismod.
Read moreMy work from home workstation
Nam ut rutrum ex, venenatis sollicitudin urna. Aliquam erat volutpat. Integer eu ipsum sem. Ut bibendum lacus vestibulum maximus suscipit. Quisque vitae nibh iaculis neque blandit euismod.
Read more
